Building Your First Base dApp with ENS Basenames (2026 Edition)
This guide walks you from “I’ve heard of Basenames” to a working Base dApp that lets users log in with username.base.eth, resolves names to addresses, and supports gasless Smart Wallet flows using OnchainKit. Expect to spend 1-2 hours if you follow along and ship a minimal but real integration.
What You’ll Achieve
You will deploy a simple Base dApp that:
- Connects to the Base mainnet (chain ID
8453) - Lets users sign in with a wallet or Smart Wallet
- Displays their
*.base.ethBasename and avatar - Accepts a Basename as input (e.g.
alice.base.eth) and resolves it to an address - Executes a test transaction to that resolved address on Base
By the end, you’ll understand enough of the ENS + CCIP Read + Base architecture to make sane product decisions, and enough of the tooling to plug Basenames into your own app.
Why This Matters
Base is Coinbase’s Layer 2 and, by 2026, one of the most trafficked EVM L2s. Basenames are its native ENS-powered usernames: username.base.eth. Instead of copying 42-character hex addresses, your users send to names they remember.
That sounds cosmetic, but it solves three real problems:
- Reduced user errors: Name-based sends dramatically cut down on fat-fingered addresses.
- Portable identity: Basenames are ENS subnames. They resolve across EVM chains via ENS + CCIP Read, so your identity is not locked to a single app.
- Developer leverage: Base treats ENS as a first-class primitive. OnchainKit gives you React components and hooks that “just work” with Basenames, Smart Wallets, and profile metadata.
Basenames aren’t a separate naming system; they’re ENS-compliant, L2-native infrastructure. That means less custom glue code for you and faster time to a usable, identity-aware dApp.
Prerequisites
You should be comfortable with modern web development and have basic EVM familiarity. You do not need previous ENS experience.
- Wallet
- MetaMask, Coinbase Wallet, Rainbow, or another EVM wallet
- Configured to talk to Base mainnet:
- Network name:
Base - RPC URL:
https://mainnet.base.org - Chain ID:
8453 - Currency symbol:
ETH - Block explorer:
https://basescan.org
- Network name:
- ETH on Base for gas
- At least 0.005-0.02 ETH bridged to Base for testing (covers several dozen transactions; Base gas is cheap)
- Use the official bridge: https://bridge.base.org
- Development environment
- Node.js 18+ and npm or pnpm
- Basic React/Next.js knowledge
- Libraries and concepts
- Familiarity with a web3 library like
ethers.jsorviem - High-level understanding of ENS: human-readable names resolve to addresses via resolvers
- Familiarity with a web3 library like
Once this is in place, the rest of the guide is mostly wiring-this is where you unlock the UX improvements that make Base dApps feel “consumer-grade.”
Step-by-Step: From Wallet to Working Basename dApp
1. Connect Your Wallet to Base
This step sounds trivial but it’s where many people silently fail: they think they’re on Base but their wallet is still on Ethereum mainnet or another L2. If your network is wrong, everything that follows will behave strangely.
- Open your wallet and add a new network with:
- RPC:
https://mainnet.base.org - Chain ID:
8453 - Symbol:
ETH - Explorer:
https://basescan.org
- RPC:
- Switch to the Base network in your wallet UI.
- Verify by visiting BaseScan and pasting your address to confirm you see the same balances and recent transactions.
Once you’re sure you’re on Base, you have a reliable foundation. Every later “my transaction is stuck” issue is easier to debug when you know the network is correct.
2. Bridge ETH to Base for Gas
This next step is where most users fail-usually by underfunding the wallet or using a sketchy bridge.
- Go to the official bridge: https://bridge.base.org
- Connect your wallet (on Ethereum mainnet).
- Bridge 0.01-0.05 ETH to Base. You will pay an L1 gas fee for this transaction.
- Wait for the bridge to complete (typically <5 minutes under normal mainnet conditions).
- Confirm receipt on Base:
- Switch your wallet to Base.
- Check the new ETH balance; or
- Search your address on BaseScan.
Once your ETH is on Base, subsequent transactions cost a fraction of a cent compared to mainnet. You now have the gas budget to experiment freely.
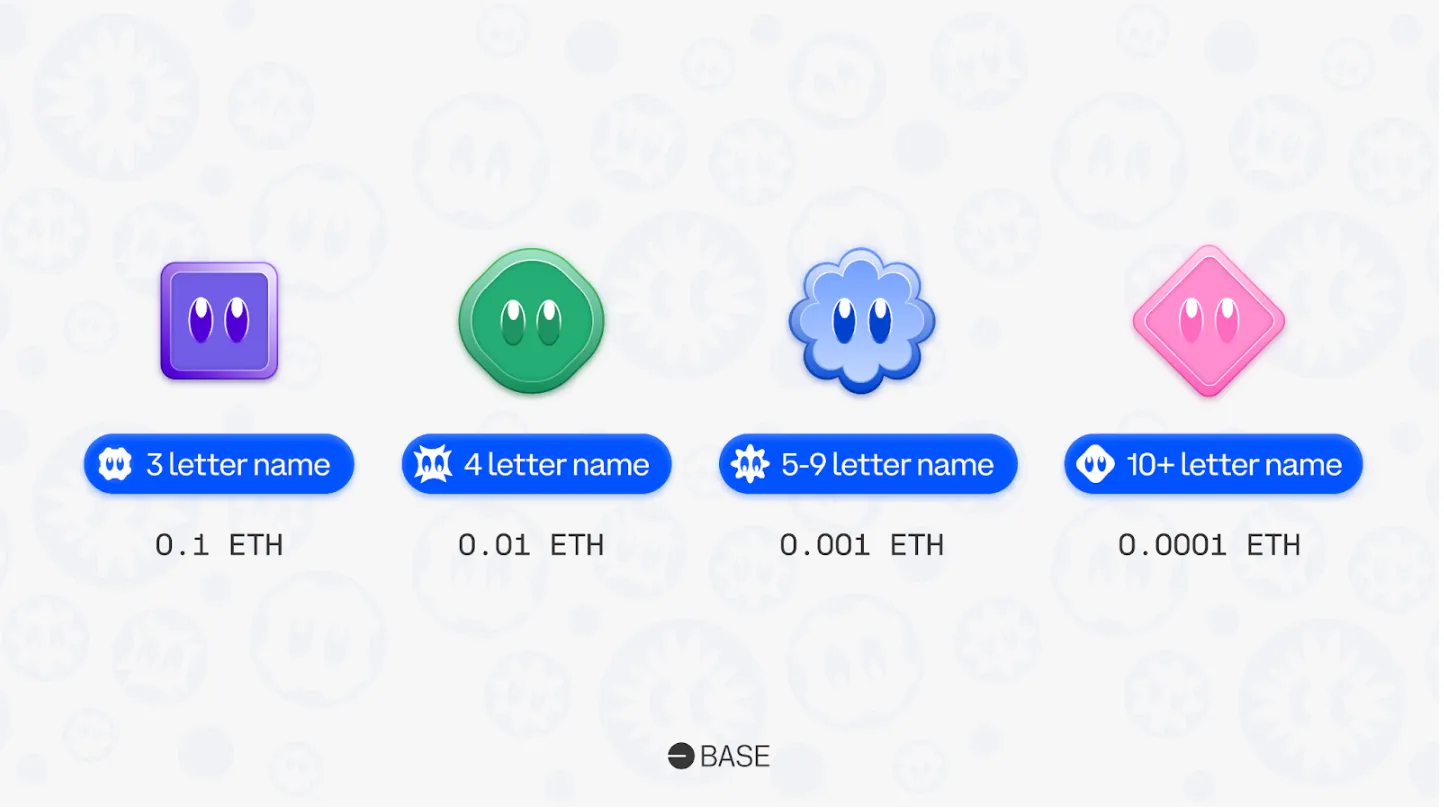
3. Register a Basename (username.base.eth)
You can integrate Basenames into your dApp without owning one, but registering at least one helps you see the full UX you’re building for.
- Open the Base app: https://app.base.org
- Navigate to the Identity / Names or similar section (the exact label can evolve, but look for “Basenames” or “.base.eth”).
- Search for an available name (e.g.
yourhandle.base.eth). - Choose:
- Your owning wallet (EOA or Smart Wallet).
- Registration duration (often 1+ years).
- Confirm the transaction. On Base, this is inexpensive; you should see the name in your profile or wallet within seconds.
Under the hood, you’ve just minted an ERC-721 subname under base.eth on Base. ENS on Ethereum mainnet delegates resolution of *.base.eth to Base’s L2 registrar and resolver via CCIP Read, so your new name is discoverable from both L1 and L2 contexts.
4. Scaffold a Simple Base dApp
We’ll use Next.js for a minimal front end. If you prefer a different framework, the core ideas stay the same.
- Create a new app:
npx create-next-app@latest base-basenames-democd base-basenames-demo
- Install basic web3 tooling and OnchainKit:
npm install ethers @coinbase/onchainkit(orpnpm add/yarn add)
- In your app entry (e.g.
_app.tsxorlayout.tsx), wrap your UI with the OnchainKit provider, configured for Base mainnet.
Conceptually, you want something like this at the root of your app:
{`import { OnchainKitProvider } from '@coinbase/onchainkit';

export default function App({ Component, pageProps }) {
  return (


  );
}`}
The exact prop names may change over time; always double-check the latest OnchainKit docs. The key idea: your entire app should sit under a provider that knows it is talking to Base (chain ID 8453).
5. Add Basename Resolution with OnchainKit
This is where you get to use Basenames in your UI without manually implementing ENS resolution or CCIP Read handling. OnchainKit ships identity components that understand ENS-compliant names on Base.
- Add a wallet connector and identity header:
npm install @walletconnect/ethereum-provideror use a built-in connector if provided.
- In a header component, render:
- A connect/disconnect button
- The connected user’s Basename and avatar, if they have one
In pseudocode using typical OnchainKit patterns:
{`import { ConnectButton } from '@coinbase/onchainkit/wallet';
import { EnsName, EnsAvatar } from '@coinbase/onchainkit/identity';
export function Header() {
return (
);
}`}The EnsName / EnsAvatar components (names may vary) take care of:
- Detecting whether the connected address owns a Basename (e.g.
alice.base.eth). - Querying the Base resolver contract for text records and avatar metadata.
- Falling back to a shortened hex address if no name is set.
If we can get a fully working name/identity header in a handful of lines, so can you-that’s the power of using ENS-compliant naming plus a first-party toolkit.
6. Wire Basenames into Your Transaction Flow
Now we’ll accept a Basename input, resolve it to an address, and send a small test transfer. This is where bad integrations can become dangerous if you skip validation, so stay focused here.
- Create a simple send form:
- Input field for “Recipient Basename or address”
- Input field for “Amount in ETH”
- “Send” button
- On submit:
- If the input looks like
*.eth, attempt ENS resolution via OnchainKit orethers.js. - If not, treat it as a raw address and validate checksums.
- If the input looks like
Example using ethers.js inside your Base-connected provider:
{`import { ethers } from 'ethers';

async function resolveRecipient(provider, input) {
  if (input.endsWith('.eth')) {
    const address = await provider.resolveName(input);
    if (!address) throw new Error('Name does not resolve');
    return address;
  }
  if (!ethers.utils.isAddress(input)) {
    throw new Error('Invalid address');
  }
  return input;
}

async function sendEth(provider, signer, toNameOrAddress, amountEth) {
  const recipient = await resolveRecipient(provider, toNameOrAddress);
  const tx = await signer.sendTransaction({
    to: recipient,
    value: ethers.utils.parseEther(amountEth),
  });
  return tx.wait();
}`}
On Base, provider.resolveName('alice.base.eth') works because:
- The ENS registry on Ethereum mainnet delegates
base.ethlookups to a CCIP Read–enabled resolver. - The resolver fetches the actual records from the Base L2 registrar/resolver contracts.
- Libraries like
ethers.jsand OnchainKit implement CCIP Read support, so the resolution feels “native” from your app’s perspective.
If you skip resolution checks and error paths here, you risk sending funds to null addresses or mis-typed names. This is the critical step where careful handling directly impacts user safety.
7. Test Smart Wallet + Gasless UX
One of Base’s strongest UX wins is Smart Wallets with gasless Basename registration using Paymasters. You don’t have to implement your own Paymaster to benefit; you just need to make sure your app doesn’t break when users connect via a Smart Wallet instead of a classic EOA.
- In your app, connect with a Smart Wallet from the Base app or Coinbase Wallet that already has a Basename.
- Verify that:
EnsNameandEnsAvatarstill render correctly.- You can resolve another user’s
*.base.ethand send them a small amount of ETH or a test token.
- Optionally, initiate a new Basename registration from the Base app using a Smart Wallet and confirm your UI updates when the transaction finalizes.
Behind the scenes, gasless registration uses a Paymaster contract to pay the gas on behalf of the Smart Wallet. Your dApp doesn’t need to know the Paymaster details; it just needs to treat Smart Wallets as first-class citizens wherever it expects an EOA.
Common Issues and How to Fix Them
Even with good tooling, you’ll hit some snags. Here are the ones you’re most likely to see in 2026, with fixes that actually work.
- “Transaction stuck” or pending forever
- Check you’re on Base, not Ethereum mainnet, in both wallet and provider config.
- Open the transaction in BaseScan:
- If it’s “Dropped & Replaced,” your wallet likely bumped gas and sent a replacement—refresh balances.
- If it’s pending for >2–3 minutes, your gas price may be too low. Resend with a slightly higher priority fee.
- “Name does not resolve” for a Basename
- Verify the name exists on BaseScan’s token page for
base.ethsubnames (search the exact Basename string). - Ensure your provider supports CCIP Read. Use a recent version of
ethers.jsor OnchainKit’s provider. - Try resolving a known-good Basename like the one you registered yourself. If that fails, your provider configuration is likely wrong.
- Verify the name exists on BaseScan’s token page for
- “Insufficient liquidity” or swap failures
- This is a DEX issue, not a Basename problem. Confirm:
- You’re on a Base-native DEX that supports your token pair.
- You’ve entered the correct token contract (e.g. canonical WETH on Base is
0x4200000000000000000000000000000000000006).
- This is a DEX issue, not a Basename problem. Confirm:
- Bridge taking forever
- Check the transaction on an Ethereum mainnet explorer first. If it’s still pending there, Base can’t finalize the bridge yet.
- Only use the official bridge at bridge.base.org or other reputable bridges with clear status pages.
- For L1 congestion, wait; do not resend identical bridge transactions repeatedly.
Pro Tips and Risk Checklist
This part is a bit tricky, but stick with me—it’s critical for security and long-term maintainability.
- Cache name lookups
- ENS/Basename resolution is fast, but you don’t need to call it on every render.
- Cache resolved addresses by name for the session, or until a transaction confirms.
- Guard against misconfigured names
- Do not assume every Basename has a valid ETH address record.
- Check that
provider.resolveName(name)returns a non-null, valid address before allowing sends.
- Understand your dependencies (risk checklist)
- ENS mainnet dependency:
base.ethultimately lives under the ENS registry at0x00000000000C2E074eC69A0dFb2997BA6C7d2e1eon Ethereum. Changes in ENS governance can affect Basenames’ root configuration. - CCIP Read gateways: Resolution depends on gateways that route L1 requests to Base’s L2 resolver. Design your UX to handle temporary resolution failures gracefully (retry, show hex addresses as fallback).
- Offchain metadata: Avatars and social links may be stored or aggregated offchain. Don’t tie security decisions (e.g. permissions) to mutable profile text records.
- ENS mainnet dependency:
- Gas optimization on Base
- Batch writes where possible (e.g. set multiple text records in a single transaction if your contract design allows).
- Avoid unnecessary onchain storage of data that can live in ENS text records or offchain metadata.
- Best times to transact
- Basenames operations on Base are cheap, but bridging in from Ethereum is not. Encourage users to bridge during off-peak L1 times (weekends, non-US business hours) if they ask you.
- Testing matrix
- Always test:
- EOA + Basename
- EOA without Basename
- Smart Wallet + Basename
- Smart Wallet without Basename
- Your UI should degrade gracefully from “named identity with avatar” down to “shortened hex address” without breaking.
- Always test:
What’s Next
Once you get past this first integration, the rest is straightforward—and powerful:
- Name-based permissions: Gate features or channels by ownership of specific Basenames (e.g. org handles like
treasury.mydao.base.eth). - Social graphs: Use ENS text records and Basenames to stitch together social identities across apps.
- Organization onboarding: Reserve Basenames for teams and products, making Base addresses readable for treasury, payroll, or protocol contracts.
- Analytics and reporting: Aggregate user activity by Basename instead of raw addresses for more human-readable dashboards.
You now have a working Base dApp that treats identity as a first-class primitive, built on top of ENS-compatible Basenames and modern tooling. Keep iterating, keep testing against real wallets, and keep your dependency surface (ENS, CCIP Read, offchain metadata) in mind as you scale from demo to production.